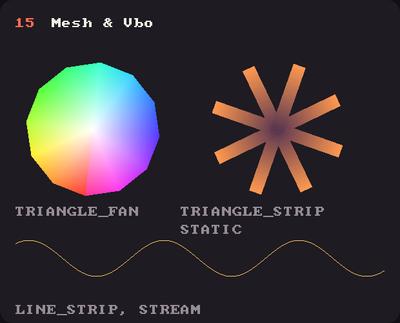
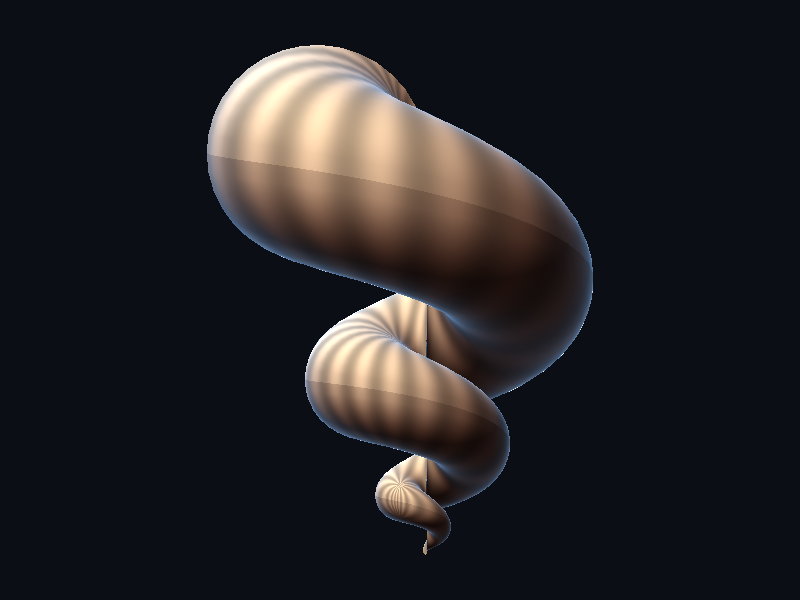
Showcase panel 15:PrimitiveModes, static and streamed Vbos.
Try it live: run uv run python examples/showcase.py, then hover panel 15, or see the showcase.
A circle is one number and a rectangle is four, but sometimes you want to say exactly where every corner goes. A kiln.Mesh is a list of points, optionally with a colour and a picture coordinate on each, that Kiln turns into triangles, lines or dots in one call. It’s the way to draw a warped photo, a ribbon or ten thousand triangles.
Vertices and colours
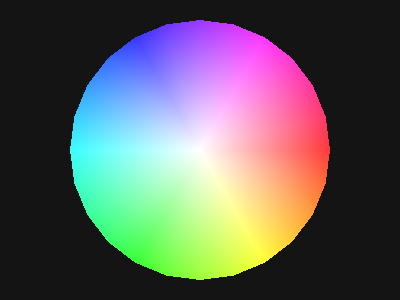
Build a mesh a point at a time with add_vertex and add_color, then draw() it. The default mode is TRIANGLES, three vertices per triangle. Kiln blends the colours smoothly across each triangle. Here is a gradient triangle fan: TRIANGLE_FAN pins the first vertex as a hub and makes a triangle with each pair of neighbours around it.
import mathimport kilnfan = kiln.Mesh(mode=kiln.PrimitiveMode.TRIANGLE_FAN)fan.add_vertex(200, 150)fan.add_color(kiln.Color(255)) # a white hubfor i inrange(25): a = i * math.tau /24 fan.add_vertex(200+130* math.cos(a), 150+130* math.sin(a)) fan.add_color(kiln.Color.from_hsb(i *255/24, 200, 255)) # hues around the rimdef draw(): kiln.background(20) fan.draw()show(draw)
Colours are 0-255 like fill, and they multiply the current tint, so tint(255, 120) before draw() fades the whole mesh.
For bigger meshes, hand over numpy arrays in one call: Mesh(vertices=..., colors=..., indices=..., mode=...). indices reuse vertices, so a quad is four points and six indices instead of six points.
Primitive modes
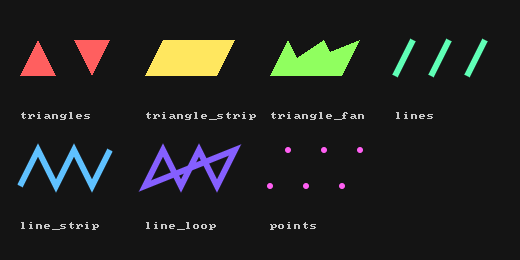
The mode decides how the same points are read. Here are the same six points in each mode. Lines are stroke(width=) points wide, whatever the transform, and points are round dots that wide.
import numpy as nppts = np.array([(0, 40), (20, 0), (40, 40), (60, 0), (80, 40), (100, 0)], float)modes =list(kiln.PrimitiveMode)palette = [kiln.Color.from_hsb(i *36, 160, 255) for i inrange(7)]def draw(): kiln.background(20) kiln.stroke(width=6)for i, mode inenumerate(modes): col, row = i %4, i //4with kiln.transform(): kiln.translate(20+ col *125, 40+ row *110) kiln.tint(palette[i]) kiln.Mesh(vertices=pts *0.9, mode=mode).draw() kiln.fill(200) kiln.text(mode.name.lower(), 20+ col *125, 120+ row *110)show(draw, size=(520, 260))
A picture on a warped grid
Bind a texture and a mesh’s tex_coords pick which part of the picture each vertex shows. They are normalised: (0, 0) is the top-left corner of the picture and (1, 1) the bottom-right, whatever its size. with image: binds the image for the block, or call bind() and unbind() yourself.
Here is the Ming jar on a grid. The vertices stay put and a flowing field of noise slides the picture coordinates, so the dragon seems to swim in moving water.
Texture coordinates are plain data, so you can animate them (as above), the vertices, or both. Use mesh.vertices to edit positions in place.
Wrapping and mipmaps on meshes
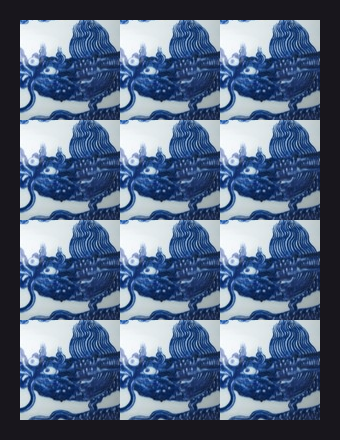
Texture wrap and mipmaps work on meshes exactly as they do for draw. Set the texture to REPEAT and let tex_coords run past 1: the picture tiles. Here a patch of the jar (the dragon’s head) repeats three times across and four down a single quad.
MIRRORED_REPEAT flips every other copy, and mipmaps = True keeps a mesh drawn small free of shimmer. Set these once in setup: changing them moves the pixels to another GPU image.
A generative ribbon
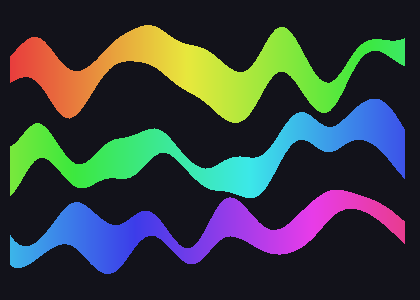
A TRIANGLE_STRIP makes a triangle from each vertex and the two before it, so alternating left and right edge points of a path give a ribbon. Give each point a colour and the ribbon shades along its length.
def ribbon(seed, y0, hue): mesh = kiln.Mesh(mode=kiln.PrimitiveMode.TRIANGLE_STRIP)for i inrange(80): x =10+ i *5 y = y0 +70* (kiln.noise(i *0.05, seed) -0.5) width =4+26* kiln.noise(i *0.04, seed +10) c = kiln.Color.from_hsb((hue + i *1.2) %255, 190, 255) c.a =230 mesh.add_vertex(x, y - width) mesh.add_color(c) mesh.add_vertex(x, y + width) mesh.add_color(c)return meshribbons = [ribbon(s *3.7, 70+ s *80, s *70) for s inrange(3)]def draw(): kiln.background(18, 18, 26)for r in ribbons: r.draw()show(draw, size=(420, 300))
The wireframe view
draw(wireframe=True) strokes each triangle edge once, stroke(width=) points wide. It’s a good way to see what you built, or a style of its own. Here the jar’s grid wobbles with its wireframe drawn on top.
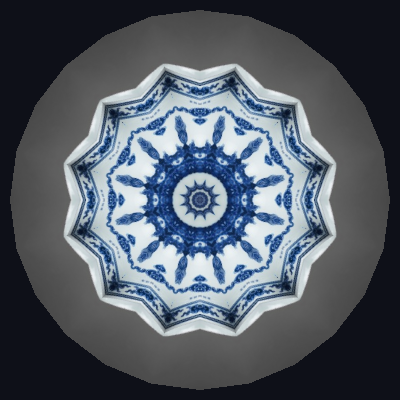
A mesh draws into an Fbo like any other shape, and an Fbo’s texture binds to a mesh like any picture, upright and with the same normalised coordinates. Together they make a kaleidoscope: draw the swirling jar into an Fbo once, in setup, then show one narrow slice of it on every wedge of a fan, mirroring every other wedge.
class Mirrors(kiln.App):def setup(self): jar = kiln.Image(jar_path) swirl = (uv0 -0.5) @ [[0.9, 0.25], [-0.25, 0.9]] +0.5# a little turn of the uvs grid = kiln.Mesh(vertices=uv0 * (280, 400), tex_coords=swirl, indices=indices)self.fbo = kiln.Fbo(280, 400)withself.fbo: # the mesh lands in the Fbo, in its pixels kiln.clear(24, 22, 28)with jar: grid.draw()# A fan: the centre, then 25 rim points; each wedge shows the same slice of the# Fbo, flipped on every other wedge because the rim's u alternates. a = np.linspace(0, 2* np.pi, 25) rim = np.stack((200+190* np.cos(a), 200+190* np.sin(a)), 1) u = np.where(np.arange(25) %2==0, 0.38, 0.62)self.fan = kiln.Mesh( vertices=np.vstack(([200, 200], rim)), tex_coords=np.vstack(([0.5, 0.62], np.stack((u, np.full(25, 0.05)), 1))), mode=kiln.PrimitiveMode.TRIANGLE_FAN, )def draw(self): kiln.background(14, 16, 24)withself.fbo.texture:self.fan.draw()show(Mirrors(), size=(400, 400))
The one thing you can’t do is bind an Fbo’s texture while drawing into that same Fbo: the GPU can’t read and write one image at once, so Kiln raises ValueError. Use two Fbos and swap them each step, as in the ping-pong examples.
VBOs: a hundred thousand vertices, drawn again and again
A Mesh hands all its vertices to the GPU every time you draw() it, which is fine for a few thousand triangles and slow for a few hundred thousand. A kiln.Vbo keeps its vertices on the GPU, in a vertex buffer object (VBO), OpenGL’s standard way of storing geometry in GPU memory since OpenGL 1.5: you give it the data once, and from then on draw() sends nothing but a command. The transform, colour, blend mode, texture and shader still apply at each draw, so one Vbo can be drawn as often as you like in as many ways as you like.
Here is a ribbon of 50,000 steps, which is 100,000 vertices, traced along a spirograph curve. We build it with numpy, and hand it to Vbo in one call, with mode saying how to read the vertices (a strip, as in the ribbon above).
STEPS =50_000t = np.linspace(0, 1, STEPS)theta = t *2* np.pi *3# three turns close the curvecurve = np.stack((4* np.cos(theta) +5* np.cos(theta *4/3),4* np.sin(theta) -5* np.sin(theta *4/3)), 1) *19.5tangent = np.gradient(curve, axis=0)normal = np.stack((-tangent[:, 1], tangent[:, 0]), 1)normal /= np.linalg.norm(normal, axis=1, keepdims=True)width =0.5+1.6* np.sin(t *2* np.pi *90) **2# a beaded edgeribbon_xy = np.empty((2* STEPS, 2))ribbon_xy[0::2] = curve + normal * width[:, None] # left edge, right edge, left, right...ribbon_xy[1::2] = curve - normal * width[:, None]hue = np.repeat(t, 2)[:, None] + [0, 1/3, 2/3] # one trip round the colour wheelribbon_rgba = np.empty((2* STEPS, 4))ribbon_rgba[:, :3] =255* (0.55+0.45* np.cos(2* np.pi * hue))ribbon_rgba[:, 3] =90# translucent: the copies will add upprint(len(ribbon_xy), "vertices")
100000 vertices
Drawing it eight times, each copy turned a little further than the one before, makes a mandala. We open the fan up and close it again, so the eight copies bloom out of a single ribbon. That is 800,000 vertices a frame, from one 100,000-vertex Vbo that never leaves the GPU. rotate just changes the matrix for the next draw().
class Mandala(kiln.App): COPIES =8def setup(self):self.vbo = kiln.Vbo(vertices=ribbon_xy, colors=ribbon_rgba, mode=kiln.PrimitiveMode.TRIANGLE_STRIP)def draw(self): kiln.background(10, 10, 18) kiln.blend(kiln.Blend.ADD) # overlapping copies glow kiln.translate(200, 200)# 0 degrees stacks the copies, 45 spaces them evenly; it loops every 30 frames spread =45* (0.5-0.5* math.cos(math.tau * kiln.clock.frame /30))for i inrange(self.COPIES):with kiln.transform(): kiln.rotate(math.radians(i * spread))self.vbo.draw()mandala = Mandala()show_video(mandala, size=(400, 400), width=400)
The same sketch with a Mesh has to move 800,000 vertices to the GPU every frame, which takes about 50 milliseconds on an M-series Mac, three frames’ worth at 60 fps. The Vbo takes under two, and mandala.vbo.uploads tells you why:
print("uploads:", mandala.vbo.uploads, "-", mandala.vbo.uploaded_bytes, "bytes, ""after drawing the whole animation")
uploads: 2 - 1600000 bytes, after drawing the whole animation
Every upload happened in setup, one per attribute. Drawing never adds to the count, which is how Kiln’s own tests check that a static Vbo costs nothing per frame.
Drawing part of it
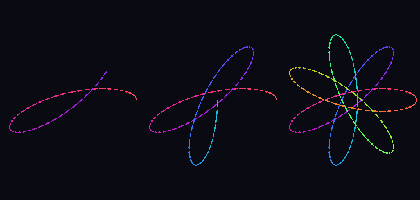
draw(mode, first, count) takes a range, counted in vertices (or in indices, for a Vbo with indices). The mode defaults to the Vbo’s own. Here the same ribbon is drawn a quarter, a half and all the way: nothing is re-sent, only the count changes.
class Partial(kiln.App):def setup(self): solid = ribbon_rgba.copy() solid[:, 3] =255# opaque: there is only one copy hereself.vbo = kiln.Vbo(vertices=ribbon_xy, colors=solid, mode=kiln.PrimitiveMode.TRIANGLE_STRIP)def draw(self): kiln.background(10, 10, 18)for k, share inenumerate((0.25, 0.5, 1.0)):with kiln.transform(): kiln.translate(70+ k *140, 100) kiln.scale(0.38, 0.38)self.vbo.draw(first=0, count=int(self.vbo.vertex_count * share))show(Partial(), size=(420, 200))
Changing a few vertices
A Vbo is for geometry that stays put, but you can still edit it. upload_vertices, upload_colors, upload_tex_coords and upload_indices replace a whole attribute, and the write_* versions overwrite just a range: write_colors(colors, offset) uploads only those colours. Here a glow travels down the ribbon. Each frame recolours 8,500 of the 100,000 vertices (the band’s new position, plus the tail it just left), so only a few kilobytes move instead of the 400 KB of all the colours.
class Glow(Mandala): WIDTH, STEP =5000, 3500# the band is 5,000 vertices wide and moves 3,500 a framedef update(self): # edit at the top of the frame, before anything is drawn head = (kiln.clock.frame %30) *self.STEP lo =max(head -self.STEP, 0) # from the tail just left... hi =min(head +self.WIDTH, len(ribbon_rgba)) # ...to the band's new headif hi > lo: colors = ribbon_rgba[lo:hi].copy() colors[head - lo:] = (255, 255, 255, 255) # the band: everything from the head onself.vbo.write_colors(colors, offset=lo)def draw(self): kiln.background(10, 10, 18) kiln.blend(kiln.Blend.ADD) kiln.translate(200, 200)for i inrange(self.COPIES):with kiln.transform(): kiln.rotate(math.radians(i *360/self.COPIES))self.vbo.draw()glow = Glow()show_video(glow, size=(400, 400), width=400)
per_frame = (glow.vbo.uploaded_bytes -100_000* (12+4)) /30print(f"{per_frame /1000:.0f} KB uploaded per frame, against {100_000*4/1000:.0f} KB for "f"all the colours")
32 KB uploaded per frame, against 400 KB for all the colours
Do partial edits like this one at the top of the frame, in update, as above. Draws keep the data they were drawn with, as in any immediate-mode drawing: if you update part of a Vbo that was already drawn in the same frame, Kiln first renders the frame so far and then writes into a buffer the GPU may still be reading, which on macOS stalls for about a tenth of a millisecond. Replacing a whole attribute doesn’t wait, even mid-frame or after a draw in update: Kiln writes it into a fresh copy of the buffer (the Instancing tutorial rewrites 4,096 rows every frame this way). Two cases render the frame so far first: a rewrite once all 16 copies of an attribute were drawn in the frame, and new data that outgrows the Vbo’s buffers.
Two details match Mesh. A texture bound while you draw a Vbo that has no tex_coords is sampled at its top-left texel everywhere, just as for a Mesh without them, so give the Vbo texture coordinates to see the picture. And Vbo(mesh, vertices=...) lets a keyword replace that array of the mesh while the mesh’s other arrays and its mode are kept. An invalid mode (vbo.draw(mode=99), vbo.mode = 99) raises ValueError at once, and first, count and offset must be integers.
Normals, attributes and models
So far each vertex has had a position, a colour and a texture coordinate, the things Kiln’s own drawing uses. A raw shader, your own vertex and fragment program, can use anything else you give a vertex. A mesh (or a Vbo) also carries:
normals, the direction each vertex faces, which a raw shader reads as in vec3 normal;;
named attributes of your own: mesh.attributes["height"] = values reaches in float height;. Floats and integers work, with 1 to 4 components each (float to vec4, int to ivec4);
z, the third coordinate, which in vec4 position; receives (Kiln’s own drawing is 2D and ignores it).
Kiln binds each input by its name, so you never write a layout(location = ...). An input your mesh doesn’t have raises a clear error when you draw. If the mesh has an attribute the shader never reads, Kiln warns once, since that is usually a typo.
Light on a surface
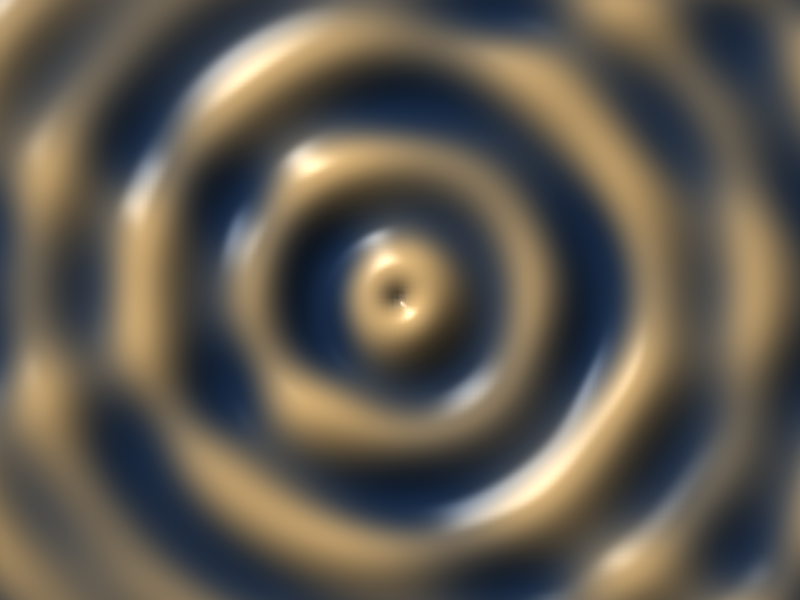
Here a numpy height map becomes a mesh. Its normals come from the slope, and its height goes along as an attribute. The fragment shader lights each pixel with dot(normal, light) and picks its colour by height:
Mesh.load reads .obj files and .ply files (ASCII, or binary little-endian), with their normals, texture coordinates and PLY colours. The shell below is a small PLY made by a numpy script next to it in the docs’ assets/models folder. If you already use trimesh, hand its arrays over instead: kiln.Mesh(vertices=tm.vertices, normals=tm.vertex_normals, indices=tm.faces).
Kiln still draws in 2D, with no camera and no depth test (those come with 3D). So the vertex shader turns the model itself, with a rotation matrix, and we sort the triangles once so the far ones are drawn first, the painter’s algorithm. The fragment shader adds growth ribs from the model’s own coordinates, which it gets through a varying:
A model you draw every frame belongs in a Vbo: kiln.Vbo(shell) keeps its positions, normals and attributes on the GPU, and the same shader draws it.
Try this
Draw the jar onto a ribbon: give a triangle strip texture coordinates that run along the picture, and let the path wander on noise. Because the mesh is cleared and rebuilt every frame, the ribbon moves in time. Try giving it vertex colours, a tint, or a wireframe pass of its own.
class Stream(kiln.App):def setup(self):self.jar = kiln.Image(jar_path)self.mesh = kiln.Mesh(mode=kiln.PrimitiveMode.TRIANGLE_STRIP)def draw(self): kiln.background(14, 16, 24) t = kiln.clock.frame *0.02 m =self.mesh m.clear()for i inrange(100): f = i /99 x =20+ f *360 y =150+80* (kiln.noise(f *2.2, t) -0.5) *2 w =20+45* kiln.noise(f *3, 9+ t) m.add_vertex(x, y - w) m.add_tex_coord(f, 0.1+0.3* f) m.add_vertex(x, y + w) m.add_tex_coord(f, 0.5+0.3* f)withself.jar: m.draw()show_video(Stream(), frames=60, size=(400, 300))